
3psd | 2200x3000 | 300dpi |
This tutorial will guide you on how to use the coloring psd files downloaded from this site. It will also include some tips and tricks to fully utilize those psd files not only to get the coloring you want but also generate new coloring for your image.
1. First, download the .psd file and save it in your computer.
2. Open Photoshop. Then, go to File > Open and select the location of the psd file you just downloaded and open it.
3. Next, open your image in Photoshop. Don't worry about the size.
4. Now, you have two files open in Photoshop, the psd file and your image..in this tutorial, I'm gonna refer to this file as the Lois image.

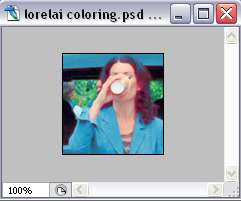
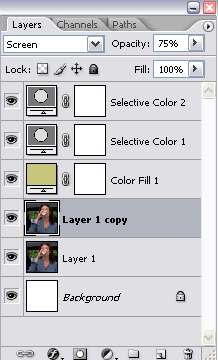
5. When you click on the psd file window, this is what you see on the layer palette:
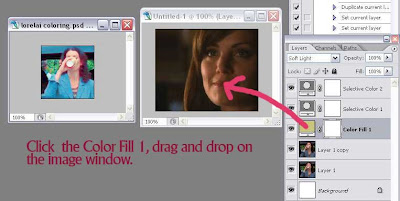
6. Now, select the first adjustment layer. Note: Adjustment layers are all the layers that is not the image layer. See picture below:
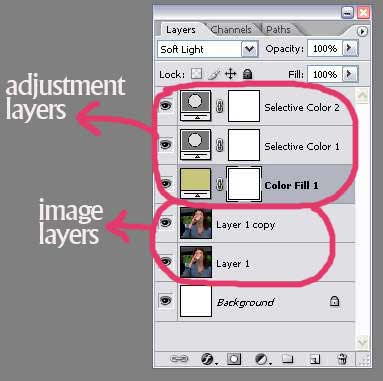
In this case, it's the Color Fill 1 layer. Click and drag that layer and then drop it on your Lois image window.
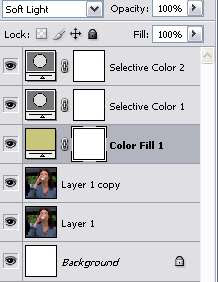
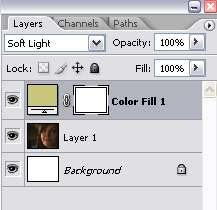
7. You'll have this for your Lois image layer palette.
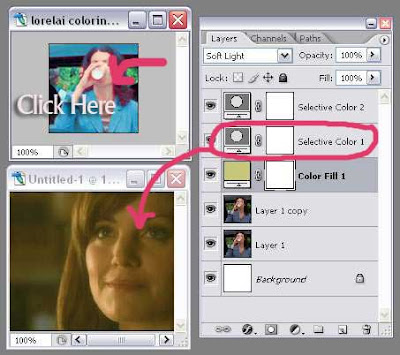
8. Click on the psd file window again to bring up it's layer palette. Then, click on the 2nd adjustment layer, which is the Selective Color 1. Drag and drop that layer on your Lois image window.
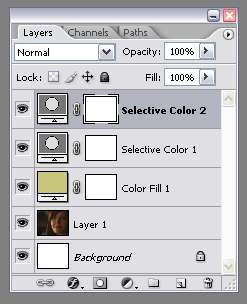
9. Repeat step 8 for the rest of the adjustment layers. And you'll end up with this in your Lois image layer palette:
10. Then, click on the psd file window to bring up it's layer palette. Take a look at the layer setting for the image layers. In this case, the 2nd image layer is set to screen with 75% opacity.
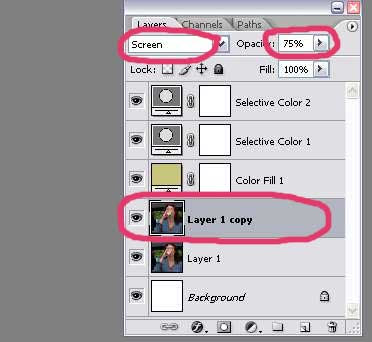
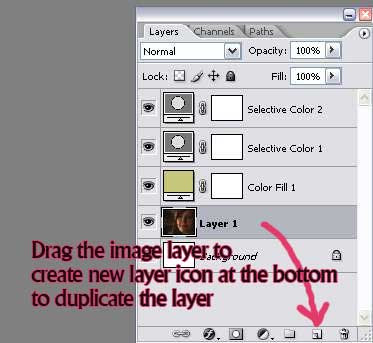
11. Click on your Lois image window, duplicate the image layer and set the duplicate layer to screen with 75% opacity to imitate the setting on the psd file.
Some Tips and Tricks after you're done with the above steps:
1. If the image is still too dark, you can duplicate another image layer and set it to screen. There's no limit to the number of screen layers you can have. Stop duplicating when the image looks good to you.
2. If the image is too bright, you can delete the screen layer. Or you can duplicate another image layer and set it to Soft Light...adjust the opacity as you like.
3. To get a slightly different coloring, you can set one or more adjustment layers to be invisible by clicking the eye icon beside that layer.
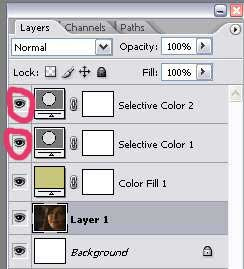
4. You can also double click on the adjustment layer to bring up the option window and adjust the settings.


All Comments